 Golf Course Review by: Billy Satterfield
The Takeaway: A hidden gem tucked away in the West Indies, Royal Westmoreland is one of the Caribbean's best tracks and is highlighted by a supreme collection of one-shotters. With ocean views and ideal conditioning throughout, Royal Westmoreland should not be missed when in Barbados. Grade A-
Quick Facts
Designer: Robert Trent Jones Jr. 1994
Cost: $300 Click for current rates
Phone Number: 1-246-419-7242
Course Website: Official Website - Visit Royal Westmoreland's official website by clicking on the link provided.
Directions: Get here! - Royal Westmoreland, Holetown, St. James BB24017 – BARBADOS
Photos: See additional photos of Royal Westmoreland
Similar Course:
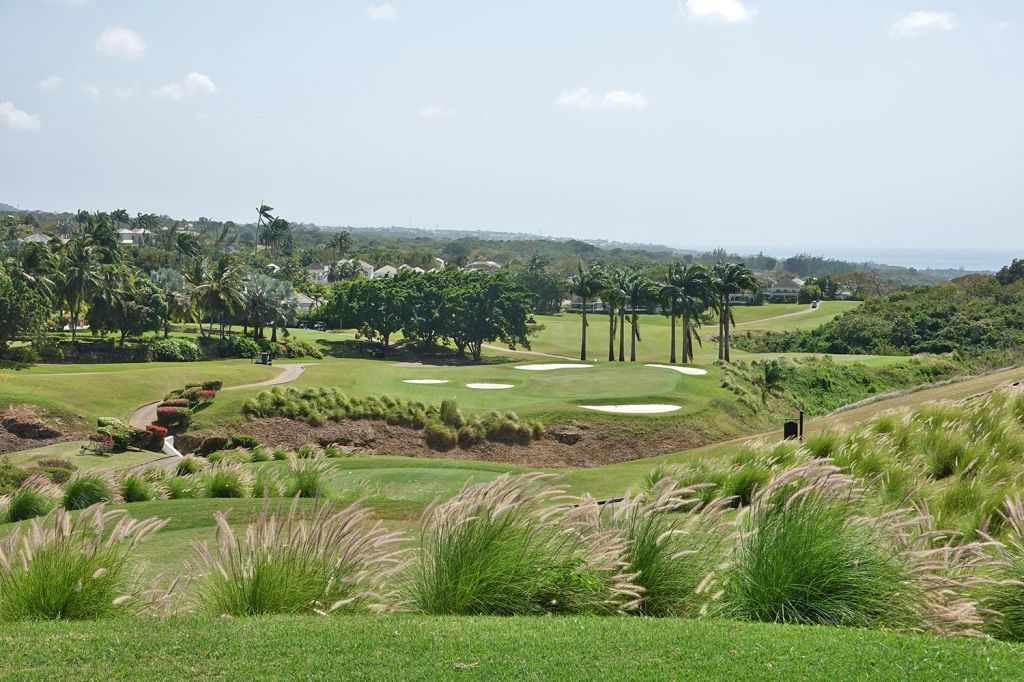
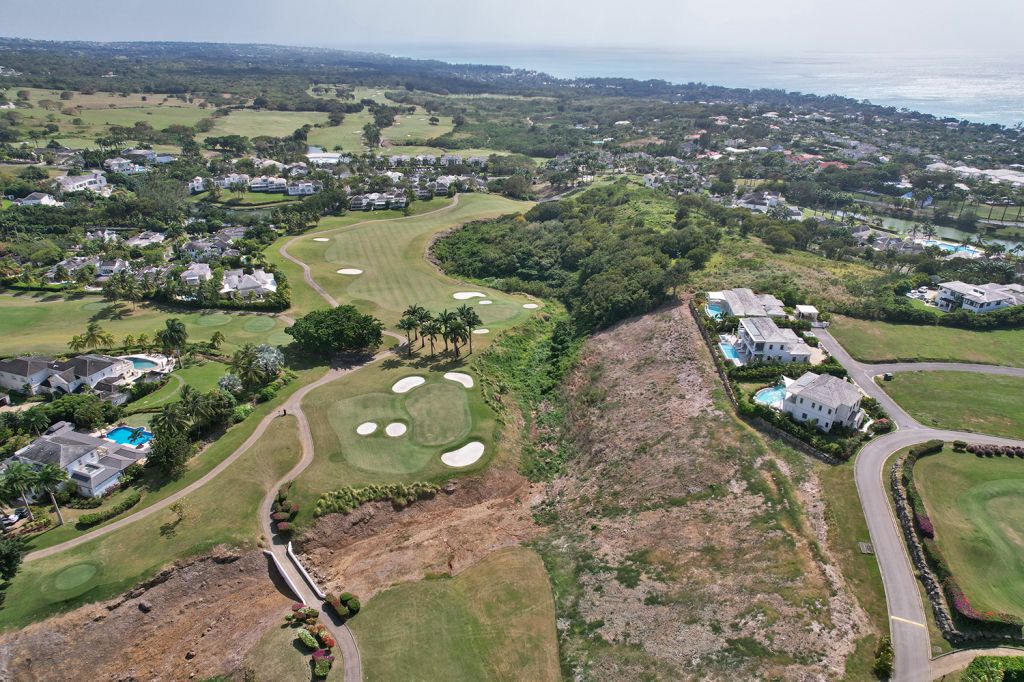
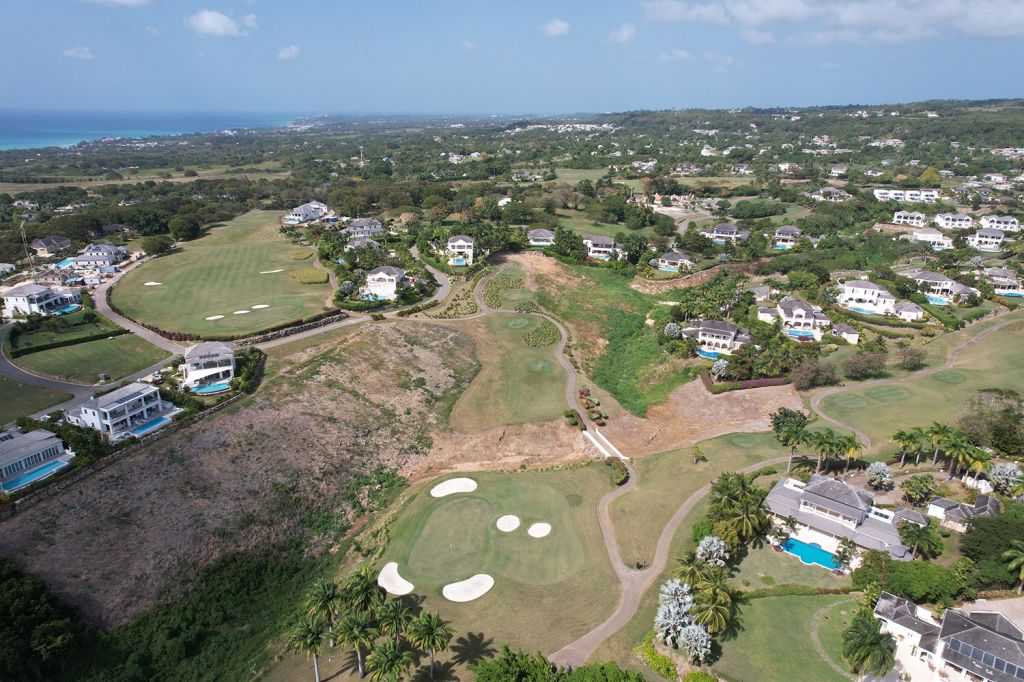
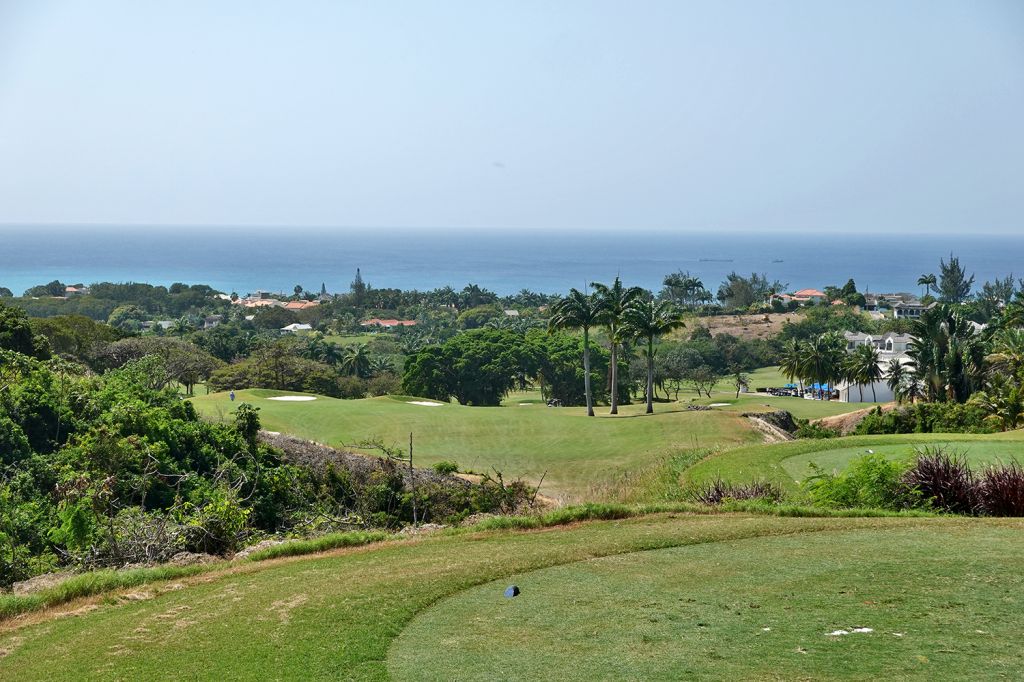
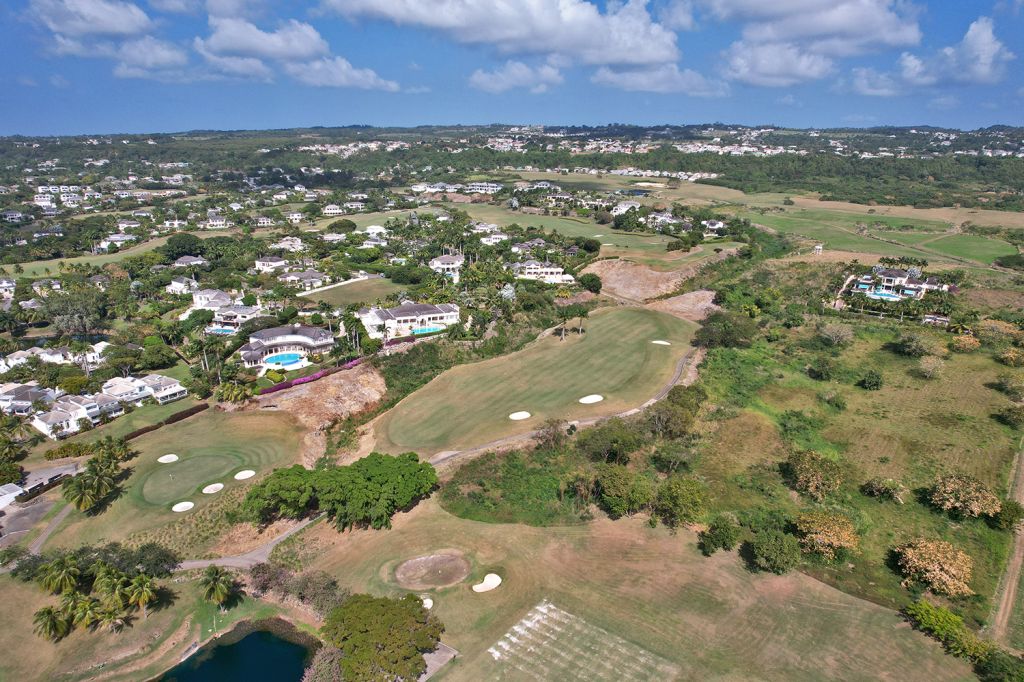
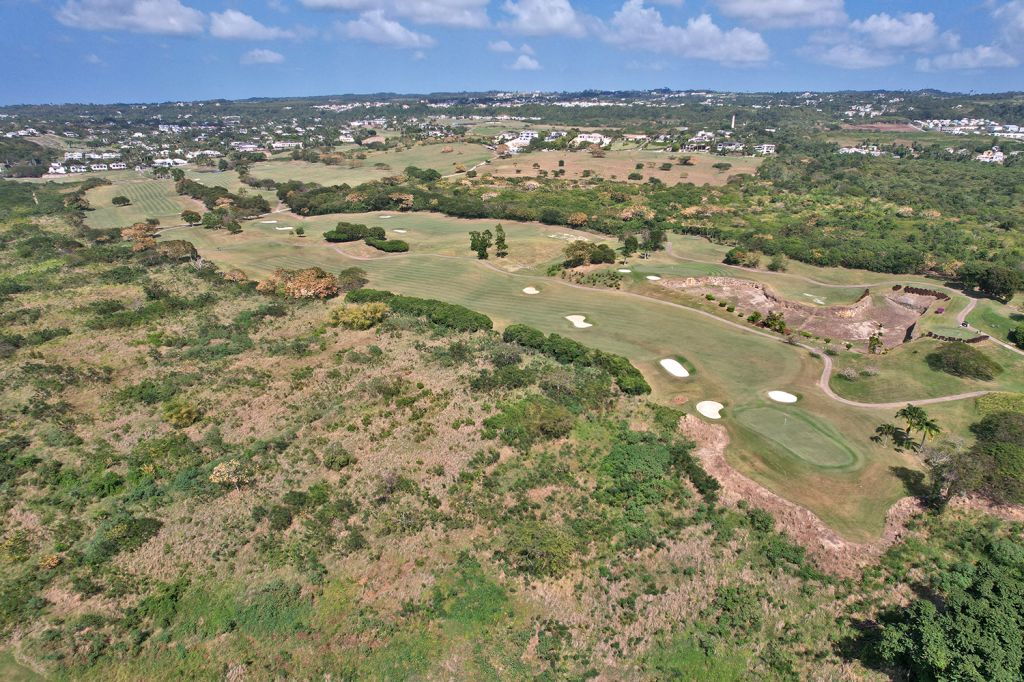
What to Expect: Located on the west side of the island of Barbados, Royal Westmoreland is laid out over the island's higher ground which in turn affords continual views of the ocean throughout the round. Unlike most tropical courses, Royal Westmoreland maintains wonderfully executed firm and fast conditions that magnify the design features that Robert Trent Jones Jr. employed at this location. The wide fairways enjoy a good amount of movement both in elevation and undulation, which in turn delivers constant engagement for the golfer and will require hitting shots from lies that are rarely dead flat. But the thing the people will all talk about at Royal Westmoreland, including resident Ian Woosman, is the high quality par 3s. The one-shotters get more difficult throughout the round as the severity of the hazards and lengths increase, so RTJ II expects you stay dialed in until your final swing to come out successful on Royal Westmoreland's short holes. Other than the newer developments around the course, Royal Westmoreland feels like a track that is much older and more mature than its 1994 inception date indicates. The mature trees and foliage combine with golden age architectural elements to create the feeling that the course has been around much longer than it actually has. Don't forget to keep your eye out for green monkeys that can be seen scaling trees and zipping through the bushes; they are a sight that is certainly unique for most golf course experiences. On a side note, the vast majority of players will elect to ride in a cart while playing so as to handle the undulated terrain and lengthy transition from the 9th green to the 10th tee, but walking would certainly be an option. Ultimately, Royal Westmoreland is a fantastic track and one that can easily be enjoyed over and over again. The facilities are excellent, the conditioning is ideal, and the setting is easy on the eyes; but it is the par threes that you'll likely tell your friends about most.
By the Numbers
| Tees | Par | Yardage | Rating | Slope |
|---|---|---|---|---|
| Gold | 72 | 7058 | 75.1 | 145 |
| Blue | 72 | 6660 | 73.4 | 141 |
| White | 72 | 6249 | 72.5 | 137 |
| Red | 72 | 5427 | 68.9 | 129 |
| Red (Ladies) | 72 | 5427 | 72.7 | 121 |
Individual Hole Analysis
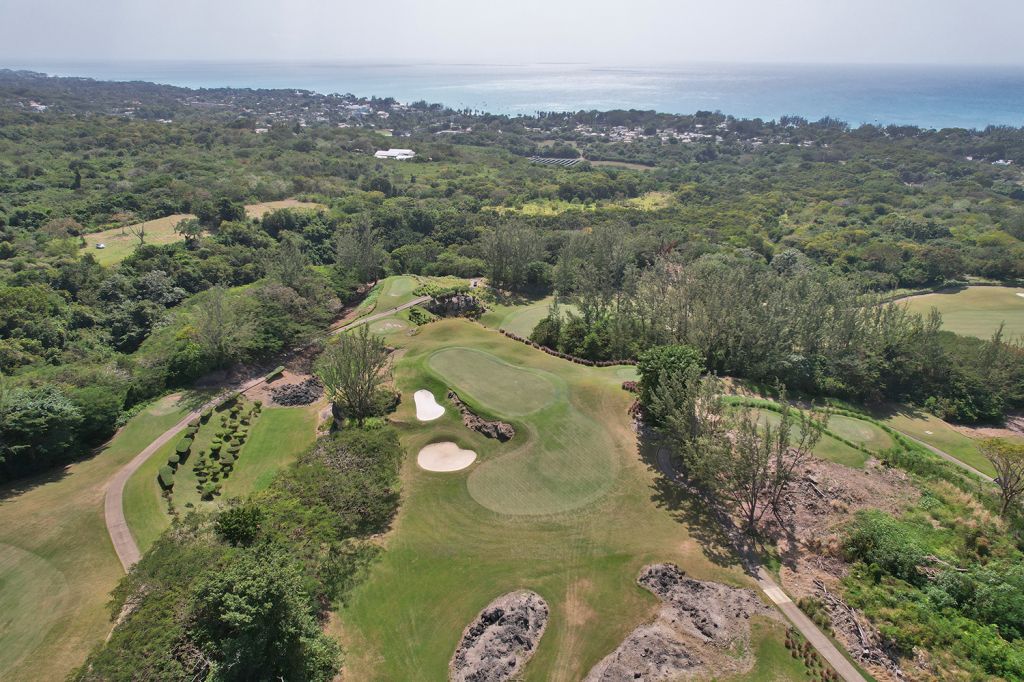
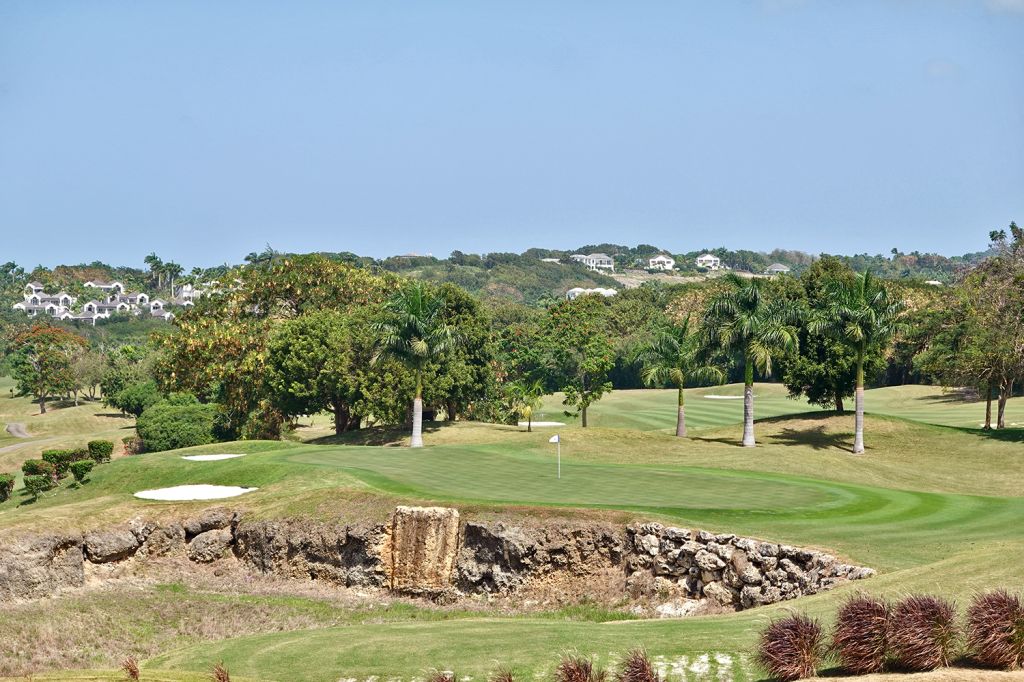
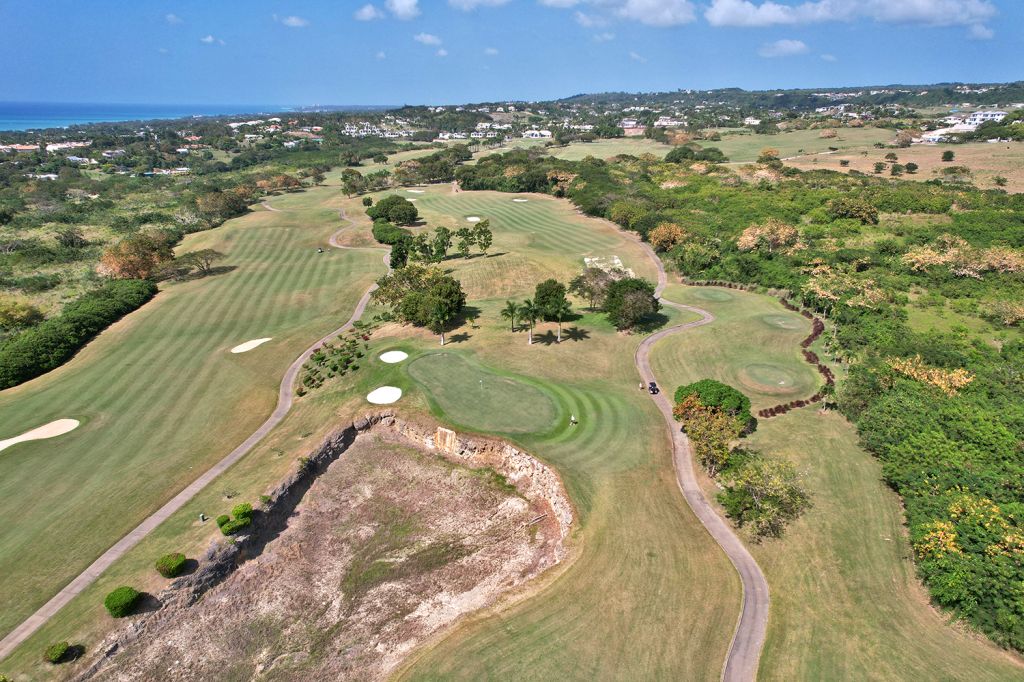
Signature Hole: 3rd Hole – 179 Yard Par 3 – The first of Royal Westmoreland's sensational group of one-shotters, the 3rd hole is a beauty that plays downhill to a green that angles front right to back left. The front of the green is fronted by a pair of bunkers that sit well below the surface and a rock formation between the sand and the putting surface. Distance control is paramount with the angle of the green calling for a draw to have the most short grass available to hit but most players unable to execute the correct shape and steep edges off the green. With the Caribbean Sea delivering an inspiring background, the 3rd is a beautiful and engaging way to kick off the par threes.
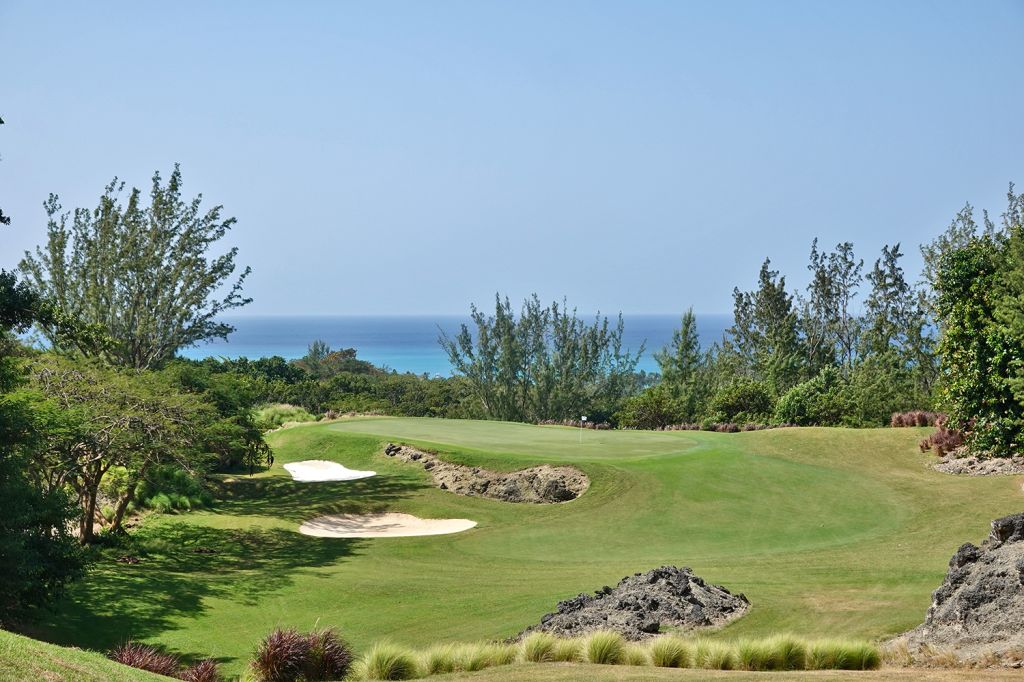
Best Par 3: 7th Hole – 167 Yards – Playing over a former pond with a rock wall that fronts the putting surface, the 7th requires a club less as it drops 20 feet to the green below. Like the 3rd, the green angles from front right to back left but gets narrower and narrower the further back it gets. The green is more than twice as long as it is wide, so taking aim at the center of the green is always a good choice. As players walk off the green they are certain to enjoy the lengthy vista across the golf course and out to the Caribbean Sea.
Best Par 4: 18th Hole – 461 Yards – The closing hole at Royal Westmoreland is a memorable one with one more panoramic view of the Caribbean Sea being offered from the tee box and a downhill drive awaiting. Tee balls need to avoid the trio of fairway bunkers found on the left side, but that would still be a better fate than slicing one into the ravine on the right and departing from your ball forever. The ravine cuts in front of the green and must be carried on the approach shot enroute to the green that features a line of three bunkers on the left side and a solo bunker on the right. The approach shot plays downhill and the green is receptive, so you can be aggressive with the line you take at the flag in hopes of carding one last birdie before wrapping up the round.

Best Par 5: 2nd Hole – 563 Yards – As I embarked on this hole, I came to the realization that this round was going to be better than anticipated and a true treat. The 2nd at Royal Westmoreland features an inviting tee shot where players can cut loose on their driver with little fear of trouble since the fairway bunkers don't come into play until the second shot for most players. The fairway ascends and bends to the right along a thick foliage area while the left side gets tightened down by the former pond found on the neighboring 7th hole. A scattering of bunkers go up the right side and will encourage players to hit a fade into the green if going for it in two or to stay up the left side on a lay up shot to set up the best angle to go at the green. The way the hole lays on the terrain feels seamless as it ascends to the green and offers an impressive view out to the sea.
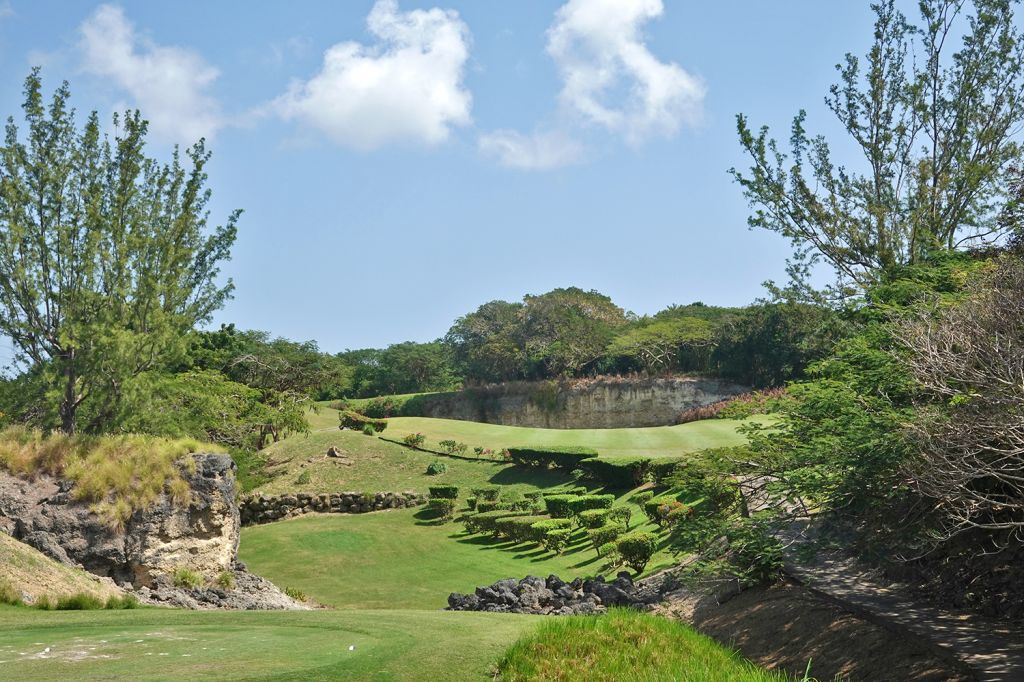
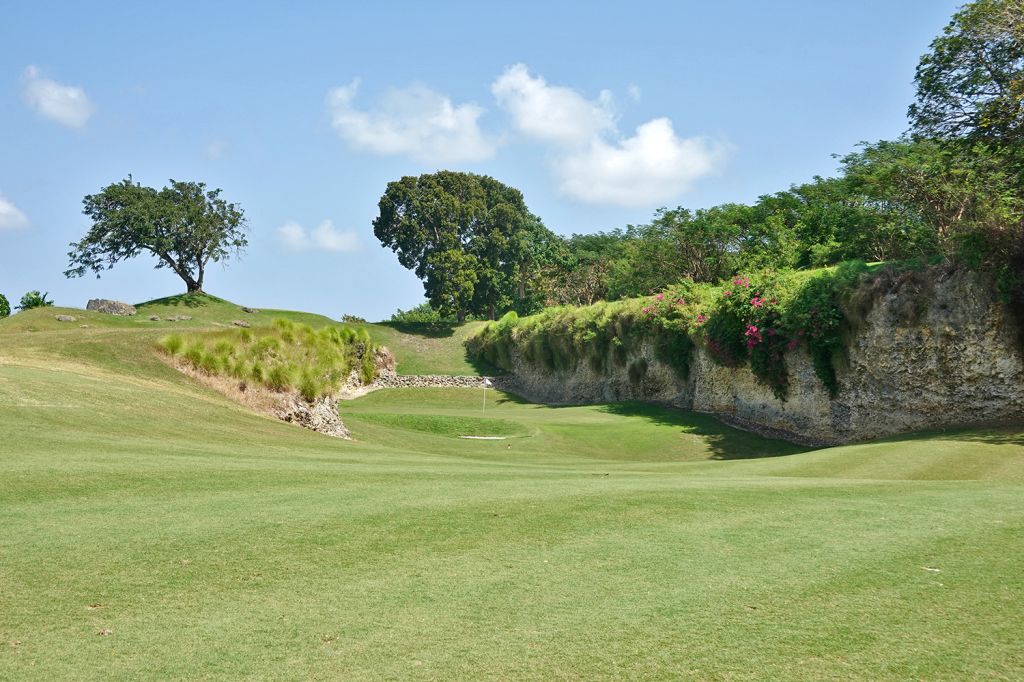
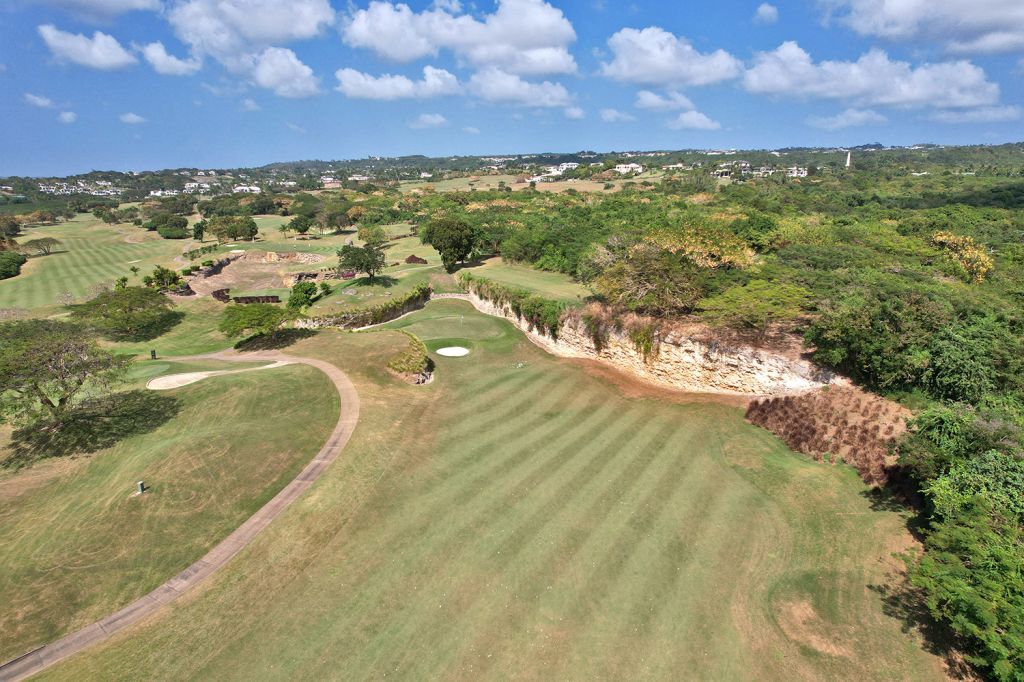
Birdie Time: 6th Hole – 335 Yard Par 4 – Considered by many as the most memorable hole on the course, the 6th is certainly the best chance for a birdie with it being drivable for long hitters. The blind tee shot plays uphill to a fairway that disappears out of view but continues forward and to the left along a tall rock wall. Players going for the green with their tee shot will need to aim left to account for the bend in the fairway and hope that they don't find the bunker fronting the center of the putting surface. The green is set in a former quarry with the putting surface sitting well below the rock walls on either side in what has to be one of the most unique locations for a green anywhere.
Bogey Beware: 15th Hole – 217 Yard Par 3 – The last of Royal Westmoreland's par threes, the 15th plays downhill to a green that is protected by five bunkers but it is the ravine on the right side that can cause players the deepest amount of trouble. The exposure to the wind here is strong and will play a significant factor given the length and drop found from tee to green, but if in doubt of how to play it the wisest decision will be to stay left and hope you miss the sand and have a decent look at getting up and down for par.